

How can a “tiny house” built on an organic farm set an outstanding building standard while inspiring future engineers and designers? Simply by seven words and two concepts: Living Building Challenge and Cradle to Cradle Design. With the most stringent sustainable design guidelines, ENGS 71 students strove to set the standard for how buildings should be designed: with the future in mind
The project trajectory was simple. Take ownership of one of the structural systems in a prospective tiny house and design it (fully to code, of course). My group, the trellis zealots (spoiler alert for what system we chose), did exactly that.
Project Goals
Our goals for this project were congruent with that of ‘real-world’ engineering project goals. We absolutely needed to design our trellis to hold load in accordance with Hanover building code. We needed our structure to not only fit our relevant specifications, but we needed it to fit within the greater tiny house system of structures. My personal goal for the project was to approach the project as if it were a contracted job; corresponding with specialized experts when needed, overseeing design decisions within the schematic of both cost & physical feasibility, and gaining general familiarity & experience with the overarching process.
Phase I: Research
For the research phase of this project, my group and I explored the concept and requirements of cradle-to-cradle design. The basic concept of cradle-to-cradle is based on the ideology that there must be a shift in what it means to design sustainably. Rather than merely recycling products, all materials should be upcycled; materials should be able to be reused in products better than their original intended purpose. At the time of the Dartmouth Tiny House project, there have been no buildings that are cradle-to-cradle certified. That’s where we come in.
Phase II: Structural Design and Specification
After our research on cradle-to-cradle was done, other groups of peers gave their research presentations on other aspects that might be useful in our design; namely living building challenge certification and various materials. Given such a bulk of information gave our group a chance to better undertake Phase II of our project.
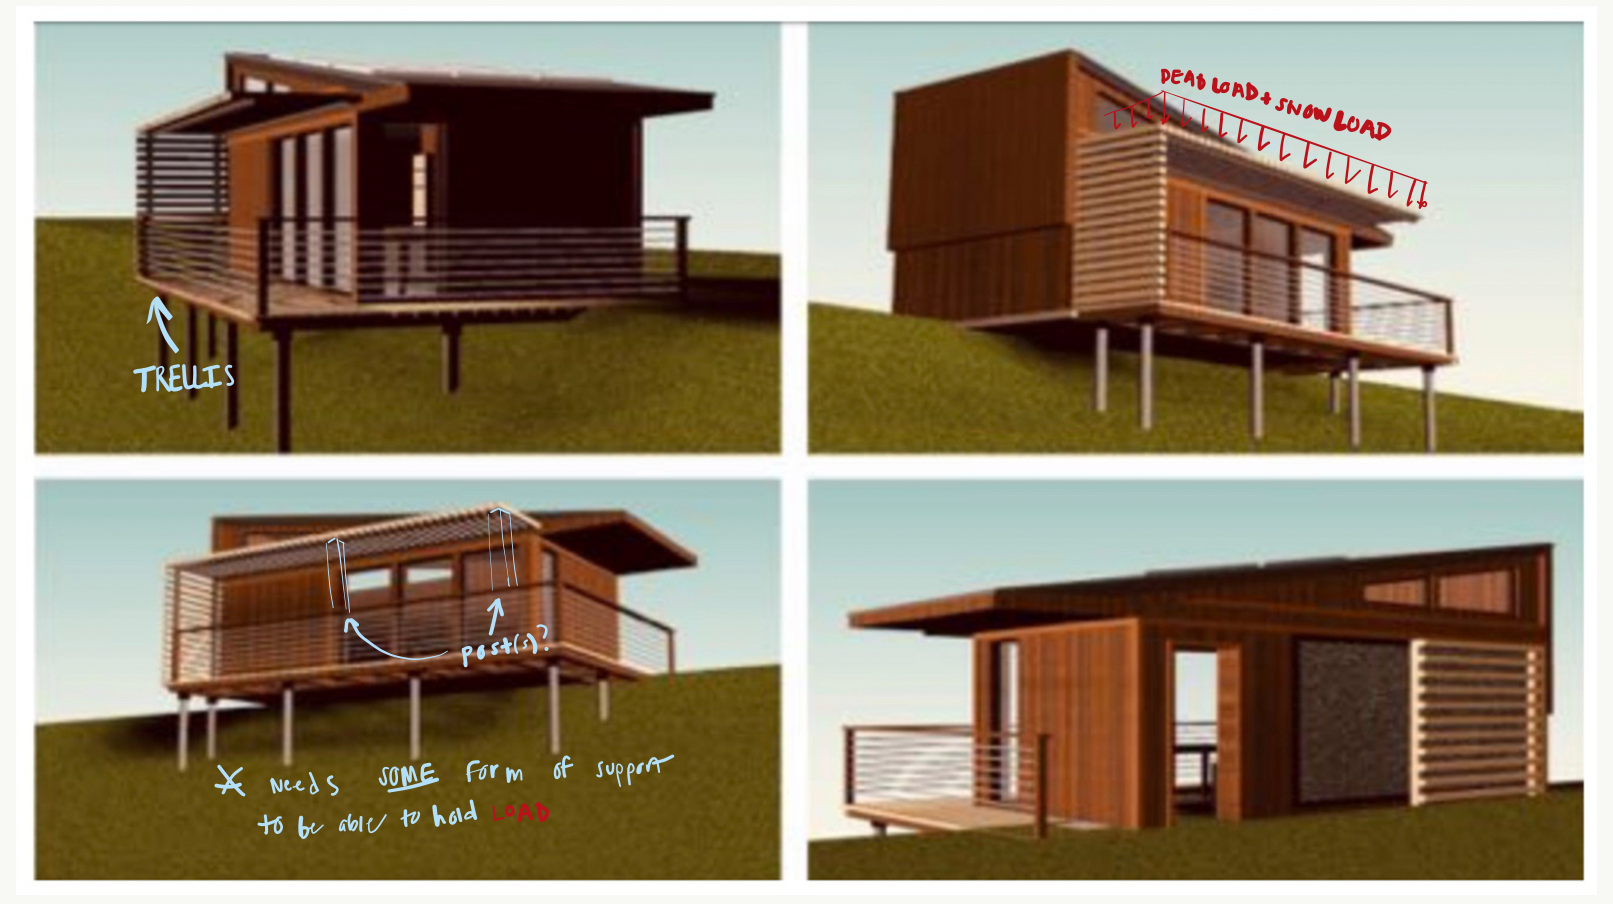
The architect’s intent with the trellis was rather aesthetic in nature; to complete the look of the overall tiny house. Thus, we made it one of our main goals to stay true to that intention. However, there was one problem. In the original design, the architect did not take it into account that the trellis would need structural support. Therefore, we knew we had to make a decision based on compromise with what was to be our design and what the original design was.
We decided that the most feasible options were using post supports, cable supports, or some combination of the two. Then, we moved to analysis: which type of support yielded the best results and how many were necessary. Combinations that we deemed relevant included:
(1) One post
(2) One cable
(3) Two posts
(4) Two cables
(5) One post one cable
The bulk of my work was calculations for the two post option. To do so, I incorporated an indeterminate static analysis using No. 2 Northern White Cedar (assumed pin-roller-roller joints @ connections).
Once we decided on a local wood (Northern White Cedar, as mentioned above) that was cradle-to-cradle and living building challenge compliant, our group split to see which options yielded optimal beam/column sizing.
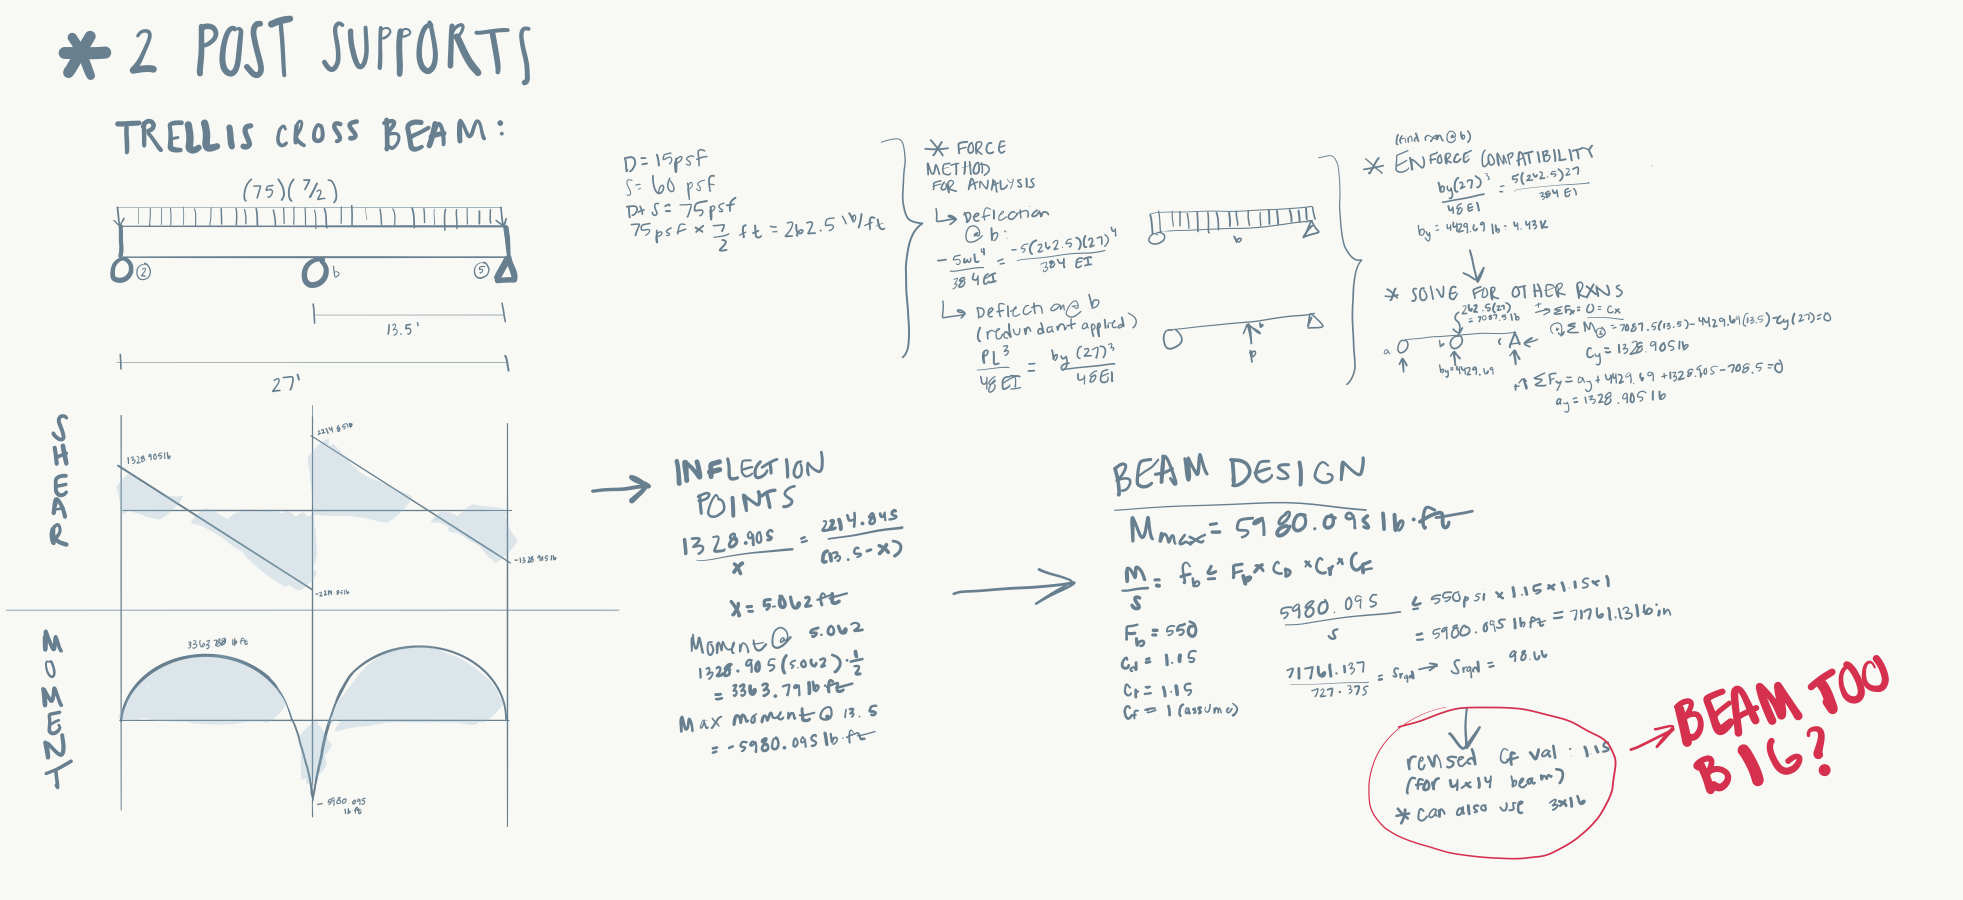
After each group member did individual calculations, we all came to one conclusion: with the current load conditions, the trellis cross beam would have to be far too large and distract from other architectural components. After much discussion of how to fix this problem, we proposed a solution with our professor and local structural design expert (Vicki May). Our solution was to reduce the snow load (S=60psf) to half its value because our trellis had equal slat/spacing between slats the way we designed it. She accepted our proposal & we were able to continue on with revised calculations.
After our group was confident with our calculations, we made the decision on our final designed based on which post/cable option would look best, be most cost effective, and be most efficient. We decided on a 3-post design (to learn more about our decisions & backing, download our report here).
Our final design fit quite well into the overall scheme of the tiny house & we were able to weigh & consolidate many different factors in our decision making process.
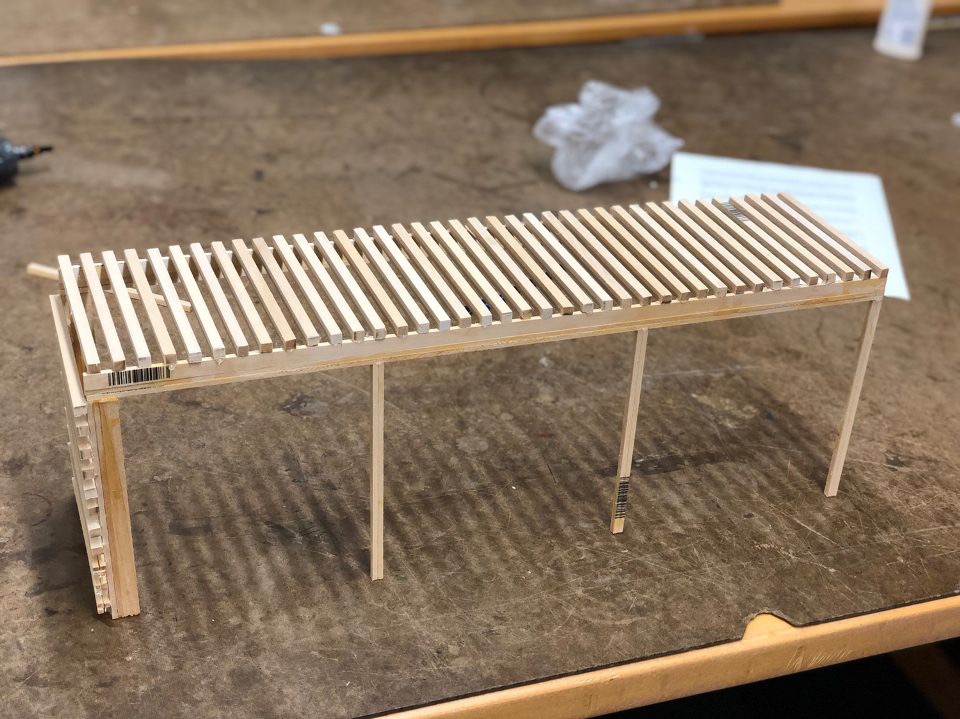
Scale Model (View 1) 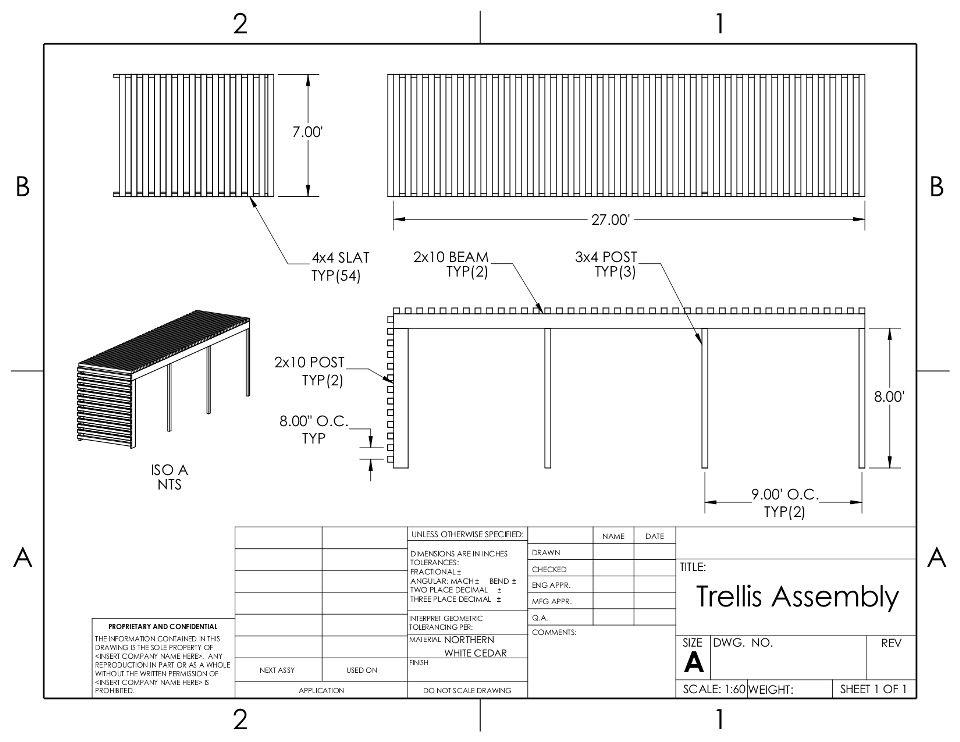
Structural Drawing 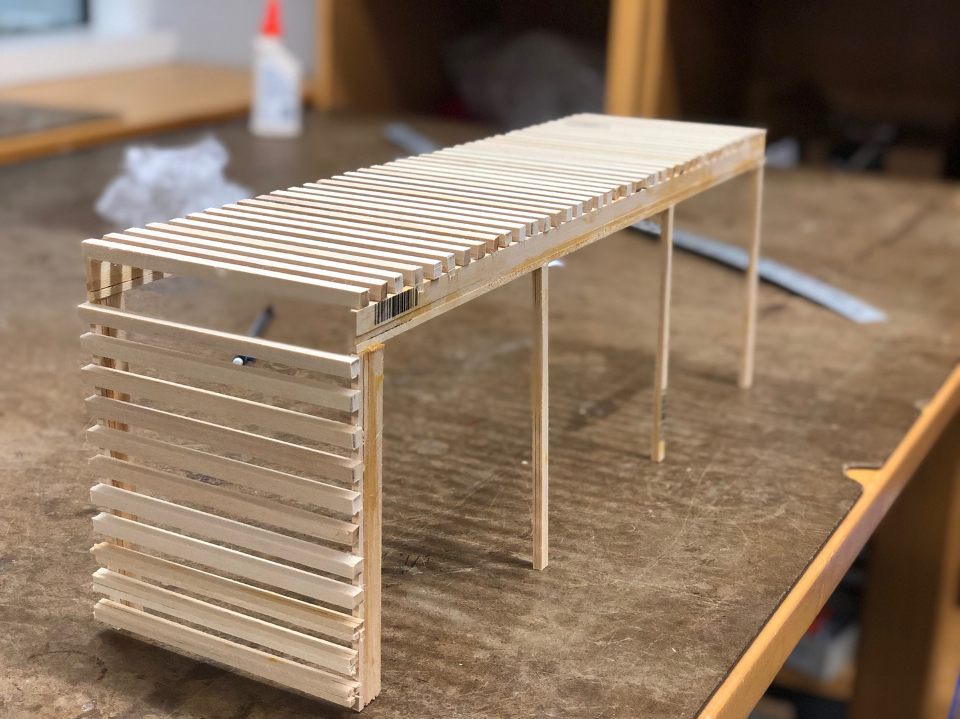
Scale Model (View 2)
Project Takeaways
Design Structure to Spec ✓ | Scaled Structure Compatible with System ✓ | Engineering Design Experience✓
From this project, I gained multiple insights. I learned that in the engineering design process, it is crucial to understand code requirements & that decisions cannot be made in isolation. In other words, you cannot think about strictly the mechanics of the projects and neglect the aesthetic/architecture; design is completely multi-disciplinary in nature. The project also provided me with experience in structural design (material choice, size choice, etc.) and allowed me to develop that experience in a collaborative environment.
Much like other design & engineering projects, this one was very iterative. We followed a cycle of case study, analysis, conclusions, case study… Which was very promising; if at first the math for the design has a daunting conclusion DON’T PANIC! There’s always some more optimization and iteration that can be done to help come to a better one.
